If you are new to ChromeOS and Google Workspace, setting up the Chrome device policies for the first time may be a daunting task. I’ll guide you through the steps you should take to setup your environment and make recommendations on what you should setup first.


Prerequisites
- You should be an “Admin” on a working Workspace Domain which has the users who would be using the Chromebooks.
- You should have Chrome Enterprise Upgrade licenses to manage your Chromebooks.
- You should have some Chromebooks available to do the testing with
Understanding Device and User policies
Before we design the Org structure for how your devices would be organized, its important to understand how policies work. There are essentially two types of policies.
Note that the same policy can never be applied at both the Device and User level. The set of policies which can be applied on the Device is distinct from what can be applied for the User.
Managing devices
Devices policies are applied at the device level and would be applicable to all users on the system. That includes users who are part of your organization, and also includes those who are not. Even Guests who don’t sign in would have to abide by the Device policies.
These policies manage the device capabilities. For example: How updates should be applied, how timezone should be set, whether Guests should be allowed to sign in, etc.
The Device policies are generally applied at the Org level, and all devices within that org will enforce those policies. In short the device policies will follow the Device regardless of which user is using the device.
Note that for Device policies to take effect on a device, the device has to first “Enroll” into the domain. This is an important step without which the devices will not get policies. I’ll explain a little later how to do this.
Managing users
User policies in contrast are applied to the users instead of the devices. These policies follow the user regardless of which device they are on.
Its important to note that while Device policies are only applicable to Devices which are enrolled into the domain, the User policies will follow the user to any Chrome device anywhere in the world. They will be enforced even on Chromebooks which belong to a different School or Business.
The User Policies are different from the Device policies and are generally used to govern what Users can do on Chromebook. Examples include: Can users use bookmarks, can they use Crostini, is incognito session allowed, etc.
One more interesting fact about User policy is that most of them also apply to the user on other operating systems. For example policies around extensions and bookmarks will follow the user even on a Macbook and Windows devices.
Designing the Org Structure
If you have managed OUs (Org Units) on Google Admin Console, or any other Org management tool, you may be familiar with the steps you need to take here.
Google provides Admins ability to create a hierarchy of Users and Devices which gives Admins great control over how policies should be applied. For example: If you are a school, you can setup a top level OU for all school devices in your school. But create a Sub-OU for Teachers and Students to differentiate between the two groups of users who need to be treated differently. This Tree-like OU management structure which you create, is not too different thn how you would manage File Folders on a Windows device.
If you already have a domain with users in different OUs, you may already have the work done for you. But one thing you should check on is whether the Devices should be organized using the same OU structure as well.
For example, there may be devices which are specifically tasked to run Kiosk applications which wouldn’t have any users logging into them. You may need to create a new OU for this batch of devices just to manage these devices.
Defining clear objectives for Chromebook management
There are many different reasons why an organization may want to manage devices. I’ll list some of them below to give you an example:
- To increase stability – by managing/controlling how updates are applied
- To reduce theft – by enforcing Forced re-enrollment which can brick the device if the device is stolen
- To limit access to specific content – to meet local legal requirements of what a subset of users can get access to
- To limit data theft – by limiting how USBs work on the device
- To reduce management overhead – by using a central dashboard to understand the health of the fleet
- To make it easier for users – by pushing apps/extensions which are critical for the organization and reduce user overhead to procure them
Before you get to the next step of picking policies it would be good to decide on priorities for your organization and get an agreement on them.
Picking the right policies to apply
Once you have a clear set of objectives, its time to pick the policies. Google maintains an elaborate set of policies here for Admins to review. Each of the policy has more detailed information on what it does, what devices it supports and what version it was introduced at.
As an example: lets look at DeviceDisplayResolution.

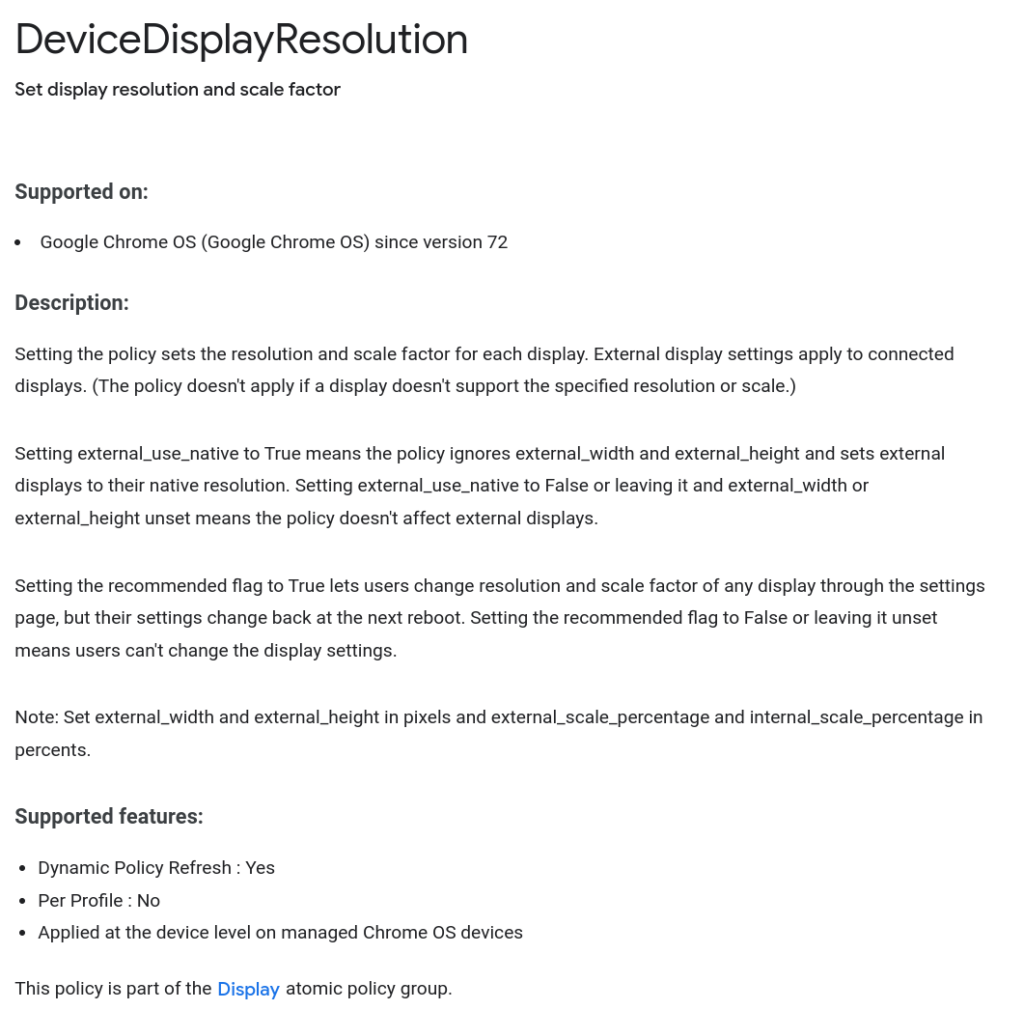
This documentation lists that its only supported on Chrome OS since version 72, its only available on “Managed Chrome OS devices” (which means Enrolled devices). and its not available “Per Profile” (which means its not a user policy)
Lets look at another policy now: ExtensionInstallAllowList

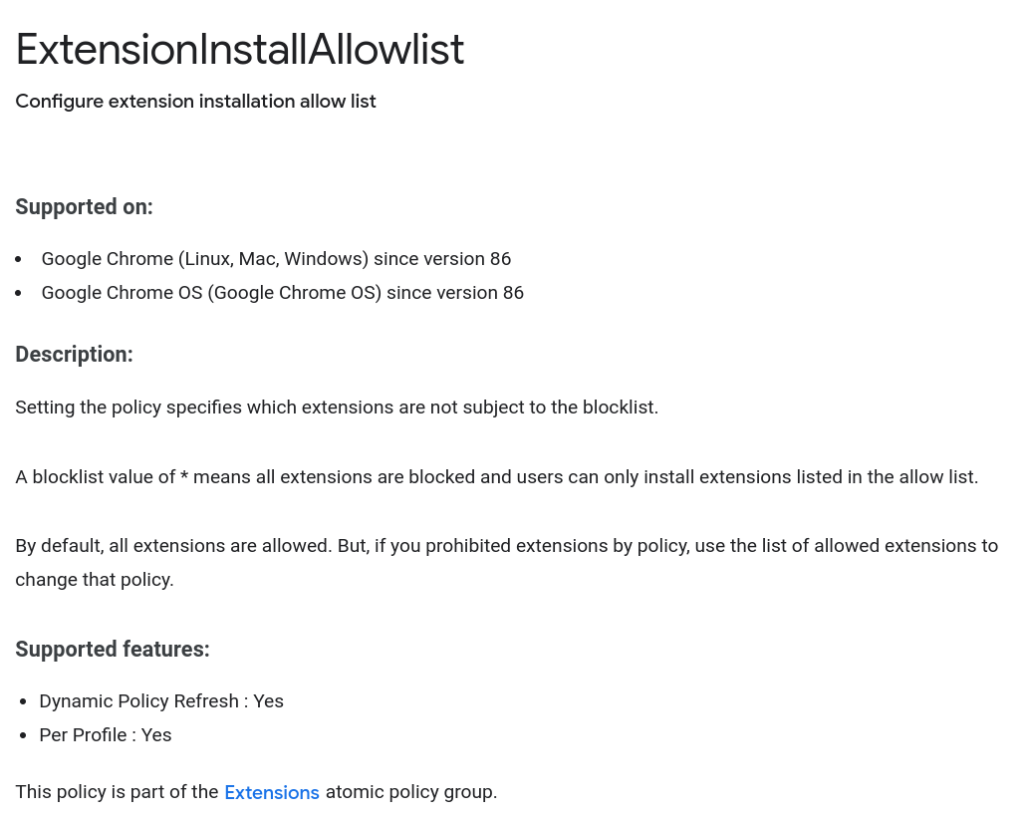
Notice that this policy lists support for multiple Operating Systems (Linux, Mac, Windows and Chrome OS). Also notice that it says its “Per Profile” which suggests that this is a user policy.
Understanding Admin Console
If you have used the Workspace Admin Console, you will notice that Chrome OS devices and its policies are organized in an easy to understand way. For others this may be slightly challenging.
Check your “Organizational units” (OUs)
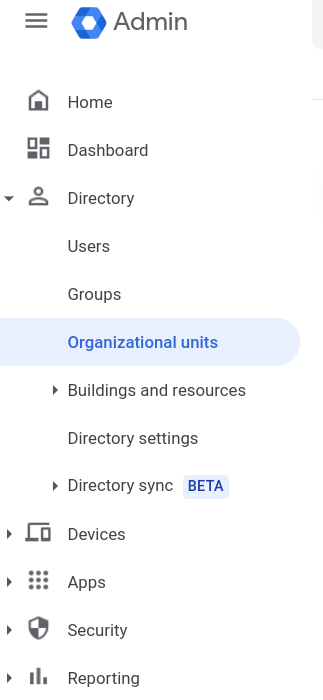
Launch Workspace Admin Console and go to “Organizational units” under “Directory” to see what your OU structure looks like. Create any missing OUs. This should be relatively quick.

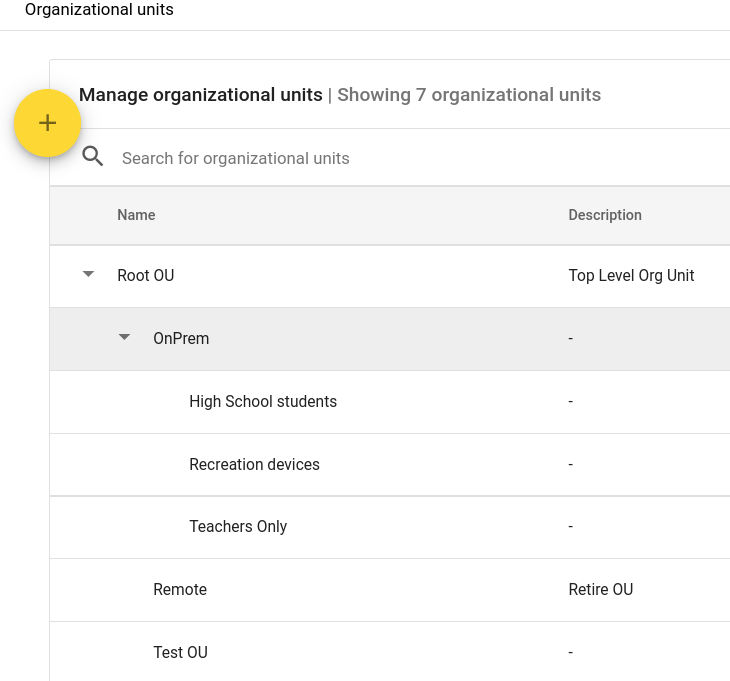
Here is what this may look like for a small School (This is my test environment)

Check if your “Users” are in the right orgs
If you already have a operational Workspace setup for your Users, you may not need to make any changes here, but it would be good to review what the structure looks like and see if you can still apply device policies using that OU Structure.
Understanding “Devices” Configuration menu
The Chrome menus have a lot of options, but for the basic setup we will only look at a few.

We will briefly go over these five sub menus which are important to understand and get comfortable with if you are going to manage Chromebooks for a while.
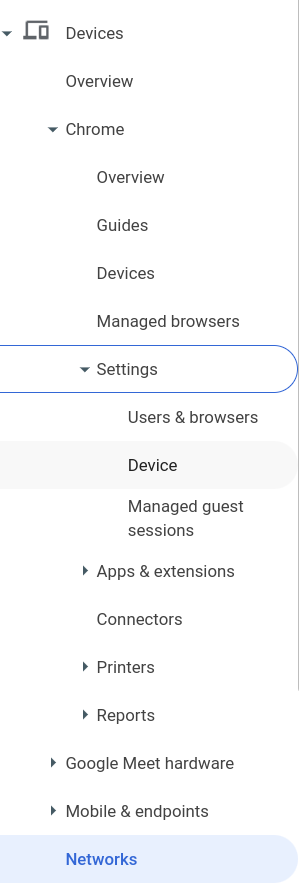
- Devices [Chromebook hardware inventory] is where all the active/inactive devices would be listed after they are first Enrolled for device management.
- Settings -> Users & browsers [User Policies] is where all the “User Policies” would be configured
- Settings -> Device [Device Policies] is where all the “Device Policies” would be configured
- Apps & extensions [App settings] is where you can push apps/extensions from the Chrome Web Store onto devices
- Networks [Network settings] is where you can configure custom network settings to remotely manage your fleet.
Chromebook hardware inventory
When you first enroll a new device they will show up in the top root OU. The Devices menu will allow you to traverse the org structure and see where each of the devices are mapped to. This is also the place where you can move devices to different OUs after they are enrolled.
Each device is listed by its Serial number and Google has ensured that no two Serial numbers from different manufacturers will ever be identical. You can click on the device and get a significantly more detailed view of the state of the device.
Device Properties
Here are some top properties which are available here.
- Model – Device model
- Serial number – Which is usually found on the bottom of your Chromebook
- CPU Model, Mac Address,
- IMEI number if you have SIM card
- ChromeOS version, Firmeware version, TPM version
- Last used, Last enrolled, Last updated, Last rebooted
- AUE Expiration (when is the device going to stop getting updates)
Device Policies
Device policies help Admins ensure safe and optimal use of the devices. Here are some top policies I would recommend you to review and set.
- Forced re-enrollment: should be turned on if you are worried about device theft
- Powerwash: allows device to be reset, but if you have Forced re-enrollment the impact would be limited
- Guest mode & Sign-in Restriction: Most schools which are required to limit what content can be viewed by students disable Guest mode and activate Sign-in Restriction to limit what accounts can be used on the device. This limits students from bypassing user policies.
- Languages: You can define the default language for the UI and the Keyboard from the language settings
- Updates: The admins can setup which “Channel” a device should be joining for updates and how the updates should be applied. This is something I recommend all IT Admins to carefully read if they have more than 100 active devices on any given day.
- Power management: Those devices which have power management capabilities can be configured using the Power management policies.
- Linux Support: Allowing users to run Linux apps is very powerful, however it dramatically limits what IT Admins can monitor. Some Schools disable Linux Support on their Chromebooks even if the device is capable of it.
- USB Access: Some organizations limit external peripherals. Admins can control if USB can be used to write to external USB sticks.
User Policies
User policies follow the user on all Chrome browsers, wherever they sign in. Here are some of the most interesting user policies I would recommend you to review and set.
- Lock screen: Configure lock screen for users. Recommend its setup to auto-lock the device once its idle.
- Incognito mode: Allows admins to disable Incognito mode which can sometimes be used to bypass some user policies.
- Ephemeral mode: Deletes user data after the user signs out. This can reduce the risk of data being left behind after Employees use personal or shared devices.
- Proxy mode: Setup proxy mode. Used by some schools/enterprises to audit access to sensitive data.
- Allow Basic HTTP authentication: Can be used to disable/enable insecure transmission of sensitive data in clear text.
- Location service on Android: Allows admins to disable access to location services when android apps are running.
- Homepage: Configure home page.
- Screenshot: Allow Admins to configure if users can take screenshots.
- URL Blocking: Allow admins to list URLs which should be inaccessibly by the user.
- Dinosaur game: Allow admins to disable the Dinosaur game.
- Smart Lock: Control if Smart lock can be used.
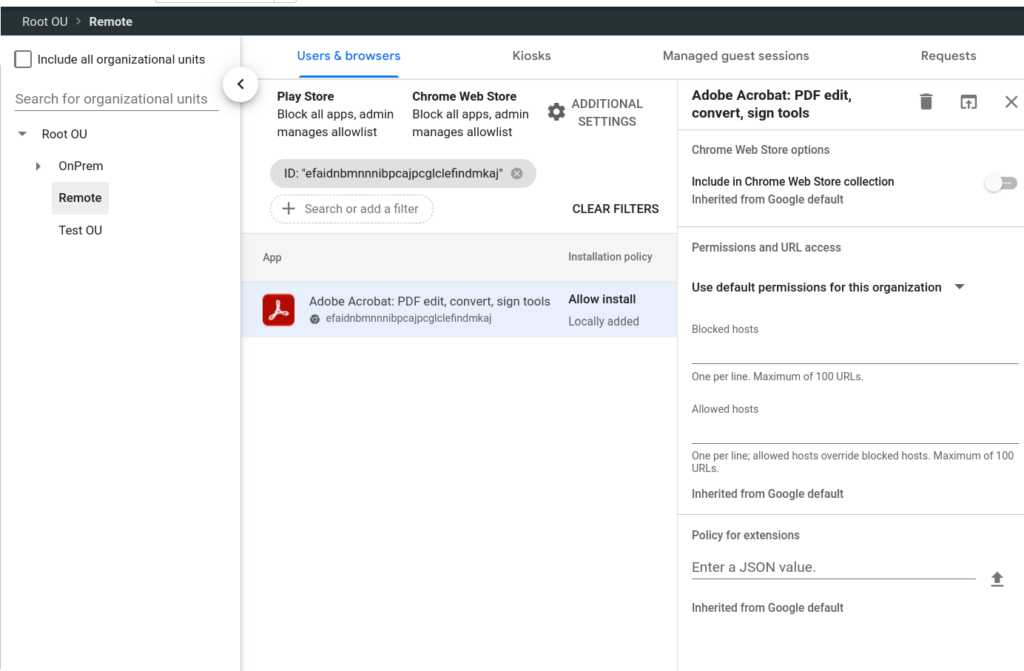
Apps & Extensions
Chromebooks are perfect devices to browse the internet and use web based apps. However, one can also push apps and extensions to the devices centrally using two interesting ways.
Chrome Web Store
Chrome users have been able to install Apps and Extensions through the Chrome Web Store for years. Apps and Extensions pushed from the Chrome Web store are built using modern web technologies. Admin Console allows Admins to push selected productivity apps directly to User Profiles using the Apps & Extension settings. For example you can centrally push Adobe Acrobat to all the users in the org.

Android Play store
With integration of Android Play in ChromeOS, Admins now have a significantly more mature apps available to push to Chromebooks using the Admin Console integration.
The installation for the Play apps follows the same process as that of the Chrome Web store apps. However, its important to note that unlike Chrome Web store apps, Android apps may not work on all devices.
Configuring networks
Most corporate networks (and schools now) run a professionally managed Wifi network which in most cases require credentials to gain access to.
Chromebooks have made this step easy to setup using Admin Console which allows various kinds of network policies to be pushed to the devices. In addition to adding Wifi credentials directly to the Chromebooks, one can also configure Proxies and certificates which allow inline content inspection for advanced threat detection.
Enrolling the first Chromebook
Once the basic setup is out of the way, its time to enroll the first chromebook into the domain.
“Enrolling” a device does two things.
- It assigns the Organization as the owner of the device and puts it in control of certain types of decision making going forward
- It will force the device to pull the first set of Device policies onto the device to understand how the Admin expects the device to be managed
The Enrollment needs to be done by someone in the organization. By default the device will be mapped to the root OU, but that can be changed using Admin Console policies if needed.
Once the device is enrolled, the user can browse to chrome://policy to see the list of policies it pulled from the server. If there are user policies also available, you would be able to see them listed as well on the same page
Conclusion
Chromebooks provide simplicity at a very reasonable cost. The focus on security and speed is the icing on the cake. Now the same simplicity and security is available to IT Admins world wide who are looking for easier ways to manage large fleet of devices for their employees and students. The exhaustive list of policies, and the tools available for pushing them to the devices makes this a no brainer.
Leave a Reply Cancel reply